Thursday, December 31, 2009

Cake Take! - Poinsettia Cake.


Before the holiday season passes, I just wanted to show off my Christmas cake. It was made as the final cake of my Wilton Fondant and Gumpaste course. I chose not to go by any of the cakes given in the course book as I wanted to make something apt for the season. The cake is the classic yellow cake filled with vanilla pudding, iced in buttercream frosting and covered with fondant. The poinsettia is made with fondant and gumpaste. I spent a lot of time figuring out how to make the poinsettia, even handcutting some of the leaves and buds and covering it with lusterdust. Finally, it was bone dry and time to assemble the whole thing and would you believe I had no clue how to do it. So now I had the sense to go online and figure out how to do it, but to my disbelief, every site I checked said that we had to wire each leaf while the gumpaste was pliable, let dry and then form into a flower by twisting the wires together. I almost had a heart attack! My uncle and family were coming over for Christmas, so there was cooking to do. We have a little tradition of baking cookies for Santa, so that had to be done! I also had to bake the cake to be decorated. I couldn't start over again, oh no!


Anyway, after a restless night , I decided to just stick the buds in a ball of pink fondant and arrange the leaves around it and glue them to the cake with royal icing. And voila! Am I proud of myself or what?! I know its not a great 3-dimensional poinsettia or anything but I sure am glad!

On this happy note, I want to wish everybody a Happy New Year and I hope the next year turns out to be great!
Mita.


Friday, December 25, 2009

A Christmas Wish!


A time of year to think of love and sharing
A time of peace for the whole world to cherish
A time to be with all your friends and family
And wish them all a Merry Christmas!

Making angels in the snow or sliding down the hill
Roasting chestnuts on the fire takes away the chill
Candy canes and mistletoe and grandma's home-made pie
Gingerbread and hot cocoa, you know its Christmas time


Seasons come and seasons pass, but we still remember
The joy we shared on Christmas last and looking forward to next December
Flowers bloom, then pumpkins grow, then suddenly it starts to snow
Then our hearts are young again and we know its Christmas time
On Christmas eve Santa will soon be coming
With lots of toys for girls and boys
To see their eyes sparkle like above
Is all we need for a Merry Christmas...........
So live your life with kindness and love in your heart
And you'll always have a Merry Christmas!
- Philippe Brisebois

Wishing you all a happy and healthy and peaceful holidays and hope all of you have a wonderful time with all your family and friends. Merry Christmas!

Mita.

p.s: The pattern for the cute mini stockings is by the very talented Julie Williams and you can find it here .


Friday, December 18, 2009

"Sweet" Survivors!


A couple of years back, while browsing through some magazines in the library around christmas time, I came across a Christmas tablescape featuring various kinds of red and white candy. It looked really nice and everything but being so hopelessly sweet-toothed as we are around here, I dont think the decorations had a chance of surviving Christmas. Somehow the idea stuck in my head and this year when I saw the scraps of red and white yarn left over from another project, I just had to try.
I used scraps of red and white worsted weight cotton yarn and a G crochet hook. Being a self-taught crocheteer, I have tried to explain the pattern as best as I could. Please let me know of any errors.

Peppermint Roll Lollipop:
Outer layer: With red yarn, chain 43.
1) Sc in second chain from hook. Sc in each ch across.
2) Ch-1, turn. Sc in each sc across. Finish.
Inner layer: With white yarn, chain 32.
1)Sc in second chain from hook. Sc in each ch across.
2)Ch-1, turn. Sc in each sc across. Finish.
Place inner layer over the outer layer.
Roll up in jelly roll style.

Sew to hold in place.

Insert a lollipop stick.

Peppermint Swirl Lollipop:
This pattern is done using both red and white yarns together and worked in rounds. Do not turn.
Red sc means sc with the red yarn pulled up. Similarly, white sc means sc with the white yarn pulled up on hook.

With white, ch-4, join to form a ring.
1) ch-1, (white sc in ring, red sc in ring) 4 times. Join to beg sc. (8 stitches)
2)ch-1,1 red sc and 1white sc in first sc, 1 white sc and 1 red sc in next sc, (1 red sc and 1 white sc in next sc; 1 white sc and 1 red sc in next sc) 3 times. Join to beg. sc. (16 stitches)
3)ch-1, 1 red sc each in the first 2 sc, 1 white sc each in the next 2 sc, ( 1 red sc each in next 2 sc, 1 white sc each in next 2 sc) 3 times. Join to beg. sc. (16 stitches)
Finish.
Make 2 of the above. At the end of row 3 of 2nd one, do not finish.
Place both motifs wrong sides together, aligning similar colors.
Slip stitch the 2 motifs together using the red yarn while working over the red area and using the white yarn over the white area.

Make sure that the yarn you are not using is carried between the two motifs and not outside.
Finish. Tuck ends in.
Insert lollipop stick. Voila!

I really can't say if these "sweeties" are going to survive Christmas because I did chance upon a pair of tiny hands pick up the lollipops and give it some pretend licks!!

Mita.


Thursday, December 17, 2009

Merry Christmas !!!


This probably is my last post for this year as I'm off for my christmas vaction in a couple of days.
Looking back, the past year had some happy moments but a very very sad and shocking one too.

- We finally got the chance to live in our own house, something that we never imagined and we feel truly blest.

- Sis & me took up a resolution to start a blog. I'm happy that we have been able to keep our resolution for 2009 and kept the blog rolling. So cheers to us !!! Well we started with lots of doubt but kept going and then we had long discussions on the blog name, blog template, font, image sizes and even the 'about us' section. We did take long breaks, but we've kept it alive somehow.

- A nice long happy summer holiday at mita's place. The fun started right from when we started filling the visa forms, going for the interviews, the journey itself, the half day break at frankfurt (with SIL) was real fun ;), and a nice relaxed vacation at mita's. Also a trip to our unlce's place at Fredrick and Atlantic city was fun too. I would like to thank my uncle &family and mita & family for making it so memorable and also for the loads of pocket money ;);). The ONLY sad part was the teary farewell at the airport. I still remember my squirming elder niece RM's face at her mum and aunt's public display of emotions.

- A cousin got engaged, and we are looking forward to the wedding. Soon after the engagement, we all sat around our ailing cousin and joked and laughed, and his mother said that she had not seen him that happy in so many months.

- But it was followed by some really sad news as we lost our dear dear cousin, and since we are still in the 40 day mourning period, there won't be any christmas for our family this time. His 40th day being December 30th.

For me the last year just zoomed off and it was crazy at times, but I look forward to a bright and happy 2010.
I had some leftover chocolate cookie dough, so this is my cookie wreath for christmas.
May you have a Blessed Christmas and a joyful New Year !!!
Gita

Wednesday, December 9, 2009

The Colourful Crostini


My search for a vegetarian snack this lenten season ended with this...the very italian Crostini. The best part of this is that you can experiment with your topping and add whatever you like. My DH suggested minced meat, but since we're vegetarian for a couple of days, this is my version of the Crostini.


Recipe :

Baguette (sliced diagonally) - 1 loaf
Salted Butter - 2 Tblsp
Garlic (finely chopped) - 6
Oregano - as taste

- Mix butter with garlic and oregano.
- Smear the baguette slices with the garlic-oregano butter.
- Bake in an oven for 5 minutes at 350F.

Topping:

Diced Onion - 1/4 cup
Diced Red capsicum - 1/4 cup
Diced Yellow Capsicum - 1/4 cup
Diced Tomatoes - 1 medium (Pulp discarded)
Corn - Half a cob
Celery - 1 stem
Chopped Garlic - 6
Olive oil - 1 tsp
Grated Cheese - as required

- Mix all the above except the grated cheese.
- Place a spoonful of this mixture on the toasted slice.
- Garnish with Grated cheese.

As the aroma of the freshly baked garlic bread lingers on, I'm sure "no one can eat just one" !!!

love,
Gita

Sunday, November 29, 2009

In Memoriam.


I'd like to dedicate this post in memory of my little cousin, Sachin, who lost his 7 month long battle with astrocytoma on the 21st. He was just 14. His passing has left a big vacuum in our family which is going to be real hard to fill. When he was little, we used to envy his beautiful, long eyelashes and tease him about it. His quick wit caught almost anybody off-guard and if there was anybody who could make his mom laugh whole-heartedly, it was him. I still remember the smile on his face when I told him that he was an uncle when my older daughter was born! While his siblings are rather on the shy side and just had their mom do their shopping, he was always outspoken and very particular about what he wore. I don't think I've ever come across any kid who has said he wants to go to a boarding school, beacuse he thought it was a better school. He did. In the long months that he suffered, not once did he complain, though he was confined to his bed and also lost his vision. He even assured his mom on the day he left that everything was going to be okay and that she shouldn't be sad. Typical him! I think he was an angel sent down by God.


Sachin had a big sweet-tooth and loved all those sweets from the bakery. This cake was made as the finale cake of my Wilton course 2 on the day before he passed.


Sachin, this one's for you! You have spread so much happiness in all of our lives and though you are in a much better place now, you will be greatly missed !

Mita.

Wednesday, November 11, 2009

Tiny Temptations - Chocolate Cups filled with sweet whipped cream!


Ever since I saw them in a magazine, I've wanted to try to make these chocolate cups. Somehow, after my not so good experience with chocolate last Christmas, trying to dip gingerbread men in chocolate, these cuties had to take a back seat. Anyway, they are fairly easy to make and more than any skill you need, you just need to be patient and take things slow!

Its a good idea to get all your stuff together before you start working with the chocolate.

You will need:
Cupcake liners
Cupcake tin or pan
Basting brush or a food-safe paint brush.

Chocolate chips - 3/4 cup
Shortening - 1 tsp.
Place both in a microwave safe bowl and microwave for 30 seconds at a time, stirring in between. Be sure that all the utensils are absolutely dry as any trace of water will just mess up the chocolate. When the chocolate is melted, use the brush to paint the inside of the cupcake liners with the melted chocolate. Make sure that the chocolate covers every nook of the cupcake liner. Work quickly because the cupcake liner will start to get heavy and lose its shape. Immediately place chocolate-painted liner in a cavity in the cupcake pan. This helps keep the shape. Refrigerate for at least 20 minutes. In case the melted chocolate starts hardening while working, microwave for a few seconds and continue with the other cups.

After refrigerating, its time to peel off the liners. Be very careful while doing this and peel a little paper at a time. Place back in the refrigerator till ready to use.

Sweetened whipped cream:
Heavy cream - 1 cup
Confectioner's sugar - 1/4 cup
Vanilla essence - 1 tsp.
Place metal bowl and whisk or beaters in refrigerator for 15 minutes. Place the above ingredients in the chilled bowl and beat till soft peaks form. Do not overbeat. Pipe the whipped cream into the chocolate cups and refrigerate till ready to serve.

Any kind of filling can be used with the chocolate cups. It can even serve as an edible bowl for ice-cream or pudding. They can be made in any size also. I used the tiny chocolate liners or bonbon cups here as I've always had a soft spot for cute tiny things. I guess it doesn't make me feel that guilty when I have a tiny second helping!!!!

Mita.


Monday, November 2, 2009

African Art


Africa, the worlds second largest continent with as many as 61 territories represents a great diversity in its art and culture. Some of the poorest people live here but I feel some of the most talented too, be it sports, music, art (though lesser own).


This is inspired from an african painting I found while browsing. I did it on pre-washed cotton fabric using synthetic dyes.

African art is very colurful with lots of yellows, oranges, reds and browns. It is also very vibrant and attractive. Human figures and animals have been the primary subject for most african art. Check out Martin Bulinya's Tinga Tinga (Tanzanian art) at http://www.insideafricanart.com/default.htm

I love Africa and wildlife and is definitely on my "places I must see before I die" list.
love,
Gita

Sunday, October 18, 2009

Sibling Act - A long overdue post after an over-extended summer holiday!


The past summer flew by quickly, but somehow its been quite a task to shake off the holiday mood and get back into routine. It was the first time we had a sibling reunion after all of us got married. Amongst all the sisteracts and all, we have a brother in the mix, who is so talented but never gets to complete any of his projects and also a sister-in-law, who is a constant source of encouragement.


Little girl SS had her birthday while everyone was here. She wanted an Ariel or mermaid cake. This really was a "Sibling Act", as the three of us were up almost the whole night to make it a surprise for SS. The marshmallow fondant cutouts were mostly done free-hand by the artistic brother! Anyway I think the sleepless night of toiling paid off as little girl SS was so excited in the morning, we had to eat cake for breakfast!


Mita.

Tuesday, June 16, 2009

"Perfectly Chocolate" Chocolate cake for the June babies


Some of my most favourite people are celebrating their birthdays in June. First of all comes my grandma - She is a go getter, loved to travel, daring and very cool kinda person. Next comes my big Sis, my best friend and the other half of this blog. Well the "About Us" section describes us the best. Then comes my dear husband. We both have often thought that we are just so "perfectly" made for each other. Last but not the least my dear dad. Well he is the rock of the family and phew....no one can win an argument with him!!!
This was my first attempt at icing a cake so I was lil sceptical as to how it would turn out, but I wanted to make something special for these special people in my life. So for all you june babies I've baked this "Perfectly Chocolate" Chocolate Cake from Hersheys.

Here's the recipe:
HERSHEY'S "PERFECTLY CHOCOLATE" Chocolate Cake

Ingredients:
2 cups sugar
1-3/4 cups all-purpose flour
3/4 cup HERSHEY'S Cocoa
1-1/2 teaspoons baking powder
1-1/2 teaspoons baking soda
1 teaspoon salt
2 eggs
1 cup milk
1/2 cup vegetable oil
2 teaspoons vanilla extract
1 cup boiling water
"PERFECTLY CHOCOLATE" CHOCOLATE FROSTING(recipe follows)
Directions:
1. Heat oven to 350°F. Grease and flour two 9-inch round baking pans.
2. Stir together sugar, flour, cocoa, baking powder, baking soda and salt in large bowl. Add eggs, milk, oil and vanilla; beat on medium speed of mixer 2 minutes. Stir in boiling water (batter will be thin). Pour batter into prepared pans.
3. Bake 30 to 35 minutes or until wooden pick inserted in center comes out clean. Cool 10 minutes; remove from pans to wire racks. Cool completely.
Frost with "PERFECTLY CHOCOLATE" CHOCOLATE FROSTING.
"PERFECTLY CHOCOLATE" CHOCOLATE FROSTING
1/2 cup (1 stick) butter or margarine
2/3 cup HERSHEY'S Cocoa
3 cups powdered sugar
1/3 cup milk
1 teaspoon vanilla extract
Melt butter. Stir in cocoa. Alternately add powdered sugar and milk, beating to spreading consistency. Add small amount additional milk, if needed. Stir in vanilla. About 2 cups frosting.
---I also added some Nutties on the top for some special effects ;) ;).


So all of you...dig in!!!

Gita

Sunday, June 7, 2009

Indian Folk Art - Warli

Warli art is a simple folk painting of the Warli tribe which depicts everyday village life, social events, marriages and unlike madhubani do not depict images if dieties or any stories from Hindu mythology.

I personally believe the Warli tribe was a set of very happy people as most of the paintings were themed on weddings, celebrations , harvest and simple household activities. There was no war, greed or bloodshed. I guess these are the blessings of a simple life.
Originally they were done on the walls of the houses in the villages of Western India. Nowadays the art form has evolved and it can be seen on cermaic, mud pots, canvas, glass and fabric.

A lot of online information can be found on Warli art, I found this quite a simple and useful site for anybody wanting to get some basic information on Warli art and also helps if you want to do your own first Warli painting.


Well I did mine too, on fabric. A beige silk yoke piece with dancing warli women in black.


and here's a sneak peek into some of the other yokes I'm doing....


So hope you had some warli fun.

cheers,

gita

Thursday, May 7, 2009

With Spring comes....................Spring Cleaning!


With the weather getting better these days, it was time to get all the winter gear out of the way. As we start clearing out the stuff, we realise that we dont have place to store it all. So our next approach was to go by the "3 aWay" rule - Sort out things to put away, throw away or give away. Everything was going fine till we ended up with some things that wouldn't fit in any category!

Little girl SS 's boots belonged in this category. We got it for her last year and she wore it for her 2nd birthday. She hardly ever wore it because summer came and by fall she had outgrown it. There was no reason to put it away, as nobody could wear it next year. Certainly didnt want to throw it away as it was in good condition and for some reason just didnt want to give it away! The hubby thinks that I am a pack rat, so to keep that reputation from coming up I had to find some use for these cuties.

Who knew the long wait at the paediatrician's office would help me come up with good use for our subject. One of the magazines there featured a flower arrangement in rain boots. Yay! I just got myself a new vase. Yes, the hubby bought me the flowers.......I guess he also had a soft spot for the boots but didn't want to admit it!

Mita.

Wednesday, April 22, 2009

Indian Folk Art - Madhubani


This post is going to be my first in a series pertaining to Indian art and craft. India is a melting pot of different cultures, art, people, religion and cuisine. Even every state in India has a variety of crafts, culture and cuisine. In this series I am sticking to art and craft. Although gaining popularity, not all the art forms are known worldwide. As one of my foreign friends said "India is so fascinating, vibrant and full of colour"
In this post I am showcasing Madhubani art, also called Mithila Art. The literal meaning of Madhubani is "forests of honey". This art form was practised traditionally by women of villages around Madhubani and Mithila in Bihar. It was done on walls and mostly depict nature and Hindu religious motifs and dieties. Now it has evolved and is done on fabric, handmade paper, pots and canvas.

I had attended a course on Madhubani painting in delhi and this is one of my first pieces that I did on fabric during the course. It consists of motifs done on the dupatta and the kurta. Madhubani paintings are filled with fine lines or dashes or coloured. There are paintings which are just "black and white" and the coloured ones too. Even madhubani art has different forms. For more information on Maddhubani art visit http://www.ethnicindiacrafts.com/Indian_paintings/madhubani/

Traditionally natural colours and twigs/bamboo were used for painting, I have used dyes and brushes/liners for the fabric and fade-proof , water-proof black pens for the handmade paper display. For all craft lovers, Madhubani is a very simple art form, easy to do and looks good on fabric as well as handmade paper.
gita

Monday, April 13, 2009

HAPPY EASTER! HAPPY VISHU! HELLO SPRING!


Finally, spring has arrived and so has Easter! With us going veggie for the past 50 days of lent, everyone here has been looking forward to Easter, just as much as spring, so that we could chew on a bone or two. Big girl RM, a carnivore, would argue as to why we had to give up fish and meat during lent. She even went to the extent of suggesting that we should give up vegetables for 50 days! Boy! Woudn't that make her happy! She made it very clear that she would have nothing to do with vegetables on Easter day. So as per tradition we had Appam and "Appa's meat curry" for breakfast, Chicken Biriyani for lunch and cake for desert . "Appa's Meat Curry" is a recipe my dad gave me a long time ago, around the time when I was newly married. It turned out well then and I have been making it ever since. While that recipe will be up in some future post, with spring, Easter and Vishu all here at the same time, its going to be the cake that takes the stage today.


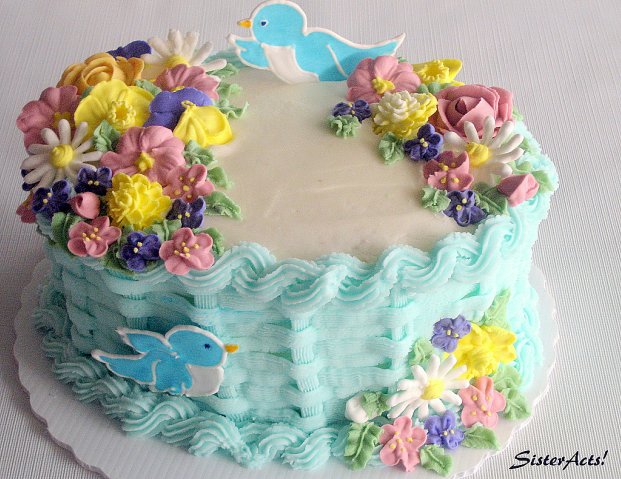
After our heartbreak over the snowshower on the official first day of spring, we were very cautious henceforth in deciding whether it was spring yet or not. However the blooming of the bright yellow Forsythia flowers on the hedge just outside our frontdoor was one sure sign that spring has truly arrived! The flowers also serve as our "Vishu Konna" this year as they have the same colour as the traditional "KonnaPoo" which blooms around the time of Vishu (New Year in Kerala). Our Easter cake was the classic yellow cake with a French Vanilla whipped frosting. With the abundance of fresh flowers and ever so helpful flower-pickers I decorated the cake with fresh forsythia flowers. We went with the whipped frosting over buttercream so that we could eat cake without all that guilt !


YELLOW CAKE:
Pre-heat oven to 350 F. Grease and flour two 9-inch cake pans.
Flour - 2 1/4 cups
Baking powder - 2 1/2 teaspoons
Salt - 1/2 teaspoon
Sift all the above together.

Milk - 3/4 cup
Eggs - 4
Vanilla essence - 1 tablespoon
Whisk all of the above in a bowl and set aside.

Sugar - 1 1/2 cups
Unsalted Butter - 1 cup (2 sticks)
Cream butter and sugar till light.

Add half the flour mixture to the butter-sugar mixture and mix till just incorporated. Now add half the milk mixture and beat well. Repeat with the other half of the flour and milk mixture. Pour the batter into the prepared pans and bake for about 30 minutes.

Cool cakes on a rack. After they are completely cool, trim the tops of the cakes to level them.

COOL WHIP FROSTING
Cool Whip - 1 (8 oz.) tub, thawed
Milk - 1 cup, cold
Jello instant French vanilla pudding mix - 1 box
Whisk pudding mix and cold milk till creamy. Fold in Cool Whip.

Frost the top of one of the cakes. Place the other cake on top of it. Now frost the top and sides of the entire cake. The frosting may also be used to pipe decorations and flowers. I used fresh flowers. If using fresh flowers, make sure they are non-poisonous and no toxic insecticides have been used on them.

In case the ingredients for the frosting is not available in your area you can use this recipe here, which is the real thing.
Dig In!!!!
Mita.

Thursday, April 2, 2009

Fish a la georgia...


I got this recipe from a book on weekend getaways, which I went through while planning for a recent vacation. What caught my attention was the western name of the dish, though most of the ingredients seemed very indian. Anyway I went ahead and made this dish. The recommended fish was pomfret, mackerel, I used seer fish slices though and it did come out well.
So here's a recipe for all fish lovers.

Fish a la georgia
Fish - 1/2 kg
Chilly Powder - 2tsp
Coriander powder, jeera powder, tandoori masala and
Amchur (dry mango powder) - 1 tsp each
Turmeric powder - 1/2 tsp
Ginger Garlic paste - 1 tsp
Coriander leaves - 1/4 cup
mint leaves - 1/8 cup
Vinegar - 2 tblsp
salt to taste.

-- Blend all the ingredient except the fish into a smooth paste.
-- Smear the fish with this and marinate it for at least 4 hours.
-- Shallow fry the marinated fish on both sides till nicely brown.

Enjoy...!!!
gita


Tuesday, March 24, 2009

Welcome Spring!


The past five months have been brutally cold, keeping us holed up indoors. But, tomorrow would change everything. It's the first day of Spring! Here on, we'd be able to step out and smell the fresh air and the pretty flowers and wake up to the cheerful sounds of the birds! At last we could shed the winter coats and the thermals and the hats and the mittens. Ah, life will be sweet! The girls suggested that we make flower-shaped cookies to celebrate. So we spent the evening baking and even decided we wouldn't touch a single cookie till the next day! (Little girl SS was an exception.....she was not going to give up a fresh cookie for all this spring nonsense !) That night we went to bed wishing it would be morning soon! (Not something we'd wish on a normal weekday!).


The next morning I'm woken up by Big Girl RM's loud shriek. I rushed over to the girls' room to check what was wrong, when I saw her standing by the window with a look of disappointment. "Its the first day of spring and its snowing, mommy! I think Mother Nature's gone cuckoo! " I looked out to see that everything was covered with a good dose of powdering and we were in for more. What happened to the sun and the birds and the flowers and all? The great expectations we had for this day! And now I'm left with the task of convincing a little girl who had decided she was going to wear a sweater and tights to school today to put put her winter garb back on.


A sudden flash of enlightenment! A few of those delicious flower cookies with her morning cup of milk should do the trick. It did! I guess RM's happy now that Mother Nature went cuckoo, she got her early morning overdose of sugar!

1 cup butter
1 cup sugar
2 eggs
2 tsp. vanilla extract
3 1/2 cups flour
2 tsp. baking powder
1/2 tsp. salt
Strawberry jam

Sift all the dry ingredients together.

Cream the butter and sugar together till light.

Add the eggs and the vanilla extract and mix till combined.

Slowly add the dry ingredients and knead into a soft dough. Cover in plastic wrap and refrigerate for an hour or two.

Pre-heat the oven to 35o F.

Roll out the chilled dough to 1/4" thickness. Cut out cookies using cookie cutters. I used Linzer cookie cutters. If you dont have Linzer cookie cutters, use any flower-shaped cookie cutter. Use a small round cutter to take out centers of the flowers of half the total number of flowers. These are the top cookies.

Bake for 10 minutes. The cookies should just begin to turn brown around the edges.

Cool the cookies completely.


To assemble:
Take a whole flower cookie. Spoon some jam in the center. Make sure not to put too much as it may overflow. Now place a flower cookie with the center cut out (top cookies) on top of the jam and slightly push it in so that some of the jam comes through the center hole.


Make any day a Spring day!

Mita.

Monday, March 16, 2009

Boarding school and Prawn Pickles

Sis and me studied in a boarding school, a convent up in the hills. We had three holidays a year when we could go home and when we came back we were not allowed to bring any food stuff (we called it 'grub') except bottled jam, ketchup and milk flavours. The nuns were very strict about this and the night before school reopened all bags and baggages were checked and all the illegal grub found would be confiscated. All those years I broke this rule and used to take to school banana chips and a bottle of Prawn Pickle that my mom made. Mom was party to this, probably because she thought it helped me deal with my home-sickness. (She packed me four large bottles when I left home after getting married :) !!! )

Well I never got caught even once, because as soon as I reached school my buddies would be there asking if I had come with the 'pot of gold' and soon it would be whisked away to secret places and hidden safely. I remember it being hidden inside the grandfather clock also once. Sometimes I'd even thought my buddies loved my mom's prawn pickle more than me...;)!!! Finally all the grub would come out of hiding on the first saturday after we reached school. Either in the orchard or in a corner of the playground we used to have banana chips with prawn pickle. The party would have lasted less than five minutes...and then again the long wait till the end of the next term and holidays.
So this is for all my school buddies who would do anything for their 'pot of gold'....

Prawn Pickle


1. Prawns - 300 g. (shelled, deveined and cleaned)
2. Vinegar - 1 tsp.
3. Turmeric Powder - 1/2 tsp.
- Cook the prawns in little water, salt, vinegar and turmeric powder and keep aside.
4. Ginger - 3 dsp.
5. Garlic - 3 dsp.
6. Fenugreek - 1 dsp.
7. Mustard - 1 dsp.
8. Cummin seeds - 3/4 dsp.
9. vinegar - 1&1/2 cups.
- Soak the above in vinegar for about 3-4 hours. Grind to a paste. Add more vinegar (not water) if required for grinding.
10. Gingelly oil - 3/4 cup.
11. Turmeric Powder - 1 tsp.
12. Chilly Powder - 2 dsp.
13. Curry Leaves - 2 sprigs
14. sugar - 1 tsp.
15. Salt - to taste.


- Heat the oil, fry the prawns till brown. Drain and keep aside. In the same oil put the curry leaves and the ground masala and fry till the oil floats. Add 1/2 cup of prawn stock and salt. When it boils add the fried prawns and simmer till oil comes on top. Remove from fire and add sugar. Adjust salt & vinegar according to taste. When cold, store in a clean dry jar.

For all those of you who haven't had a banana chip-prawn pickle sandwich, trust me you'll be left asking for more...!!!

gita

Tuesday, March 3, 2009

Beauties on the Red Carpet - Chocolate Whirls

With "Slumdog Millionaire" being nominated for every possible category, I must say that this year Oscar fever was running high at our place. Our big girl, RM, who loves anything Indian, couldn't be more excited especially after tragic outcomes for our Desis in American Idol and Superstars of Dance this year. L'il girl SS just had to hear "Jai Ho" and she would come charging down, 'Mommy, that's "Sumdog Minnaire!" '. We, too, were psyched at Rahman being nominated.

So, what do Chocolate Whirls have to do with all this? Well, I had this recipe from my mom's old recipe collection in mind for some time and decided to make it the weekend snack. After all the kneading and rolling and deep frying, and happy with the outcome, I thought it could be blogworthy. Soon, we were getting our Chocolate Whirls to pose for a picture and big girl RM goes "Mommy, they look like they're walking the red carpet!" (Whoa! She sure did learn a few technical terms around the Oscars!!!) So, to everyone who is still deciding which of the beauties on the red carpet were hot, or not, we have our winner - Chocolate Whirls!
A special wish also to one lady who definitely deserves the red carpet -Happy Birthday Amma! (After all we didnt turn out so bad, did we???!!!)

Flour - 1 1/2 cups
Powdered sugar - 3 tbsp
Salt - a pinch
Butter - 2 tbsp, cut in pieces
Milk - 2 tbsp
Mix the above ingredients together to get a crumbly mixture. I suggest you add the milk a little at a time to prevent the mixture from becoming too wet. Divide the mixture into 2 parts. Knead one part well, adding water if needed to make a stiff dough.
To the second half of the mixture add:
Cocoa - 2 tbsp
Knead it well, adding water if needed to make a stiff dough. Now we have plain dough and chocolate dough. Roll out each dough separately into 2 large squares.
Mix together:
Cornflour - 4 tbsp
Butter - 2 tbsp, melted.
Spread a thin layer of the above mixture on the plain dough square. Place the chocolate dough square over it. Roll the whole thing in jelly roll style from one end to the other. This makes one log of dough with alternating plain and chocolate layers. Cut the log into about 1/2" thick slices. Roll out each slice to flatten a little.
Deep fry in vegetable oil. Drain on paper towels. Dredge in Confectioner's sugar.

Enjoy!
Mita

Tuesday, February 24, 2009

In pursuit of "Chocolat"

"This guy found a bottle on the ocean, and he opened it and out popped a genie, and he gave him three wishes. The guy wished for a million dollars, and poof! There was a million dollars. Then he wished for a convertible, and poof! There was a convertible. And then, he wished he could be irresistible to all women... poof! He turned into a box of chocolates."

Well this is the power of chocolate...Irresistible!!! I'm yet to meet someone who doesn't like chocolate. In our house there are two basic rules with regards to food.
1. It has to be visually appealing.
2. Dessert has to be gooey, dark and sweet. ( so its chocolate all the way)

Now these two rules were laid out by my DH a self confessed chocoholic, and the only time I'm forgiven for the cardinal sin of breaking rule #1, is when rule #2 is strictly adhered to...gooier, darker, sweeter!!! So this weeks post is dedicated to my chocoholic grandma, chocoholic DH, chocoholic niece RM (if there was a competition am sure they will figure in the top 5 ;) ) and all chocoholics.

The valentine platter...
The recipe for these home made chocolates are from Aparna of My Diverse Kitchen. Thanks Aparna for this amazingly easy recipe. The best part of this recipe is that there are very few ingredients and all are easily available in the market. She has also given the recipe for 3 different fillings - coconut, coffee and marzipan. I tried the coffee filling and also tried my own chcoclate Ganache filling.


Ganache filling:
Dark semisweet chocolate - 100 gm
Butter - 1 tsp
cream - 1 tsp
- Melt dark chocolate in a double boiler. Mix in the butter and the cream till blended. Refrigerate till firm. Scoop with spoon and fill chocolate centres.
Seen above are the chocolates with gooey chocolate ganache and coffee filling. For chocoholics, the ganache filling is a 'must try'.

I also made plain milk chocolates using moulds. They say chocolates can do wonders and I say chocolates can do weird things too as I got bitten by the Robert Frost bug...So here I go...

The Chocs are gooey, dark and sweet.
But I have dinner yet to eat,
And piles of other recipes to try,
And piles of other recipes to try.


So...till then!!!

gita

Tuesday, February 17, 2009

Hats Off !!!

I guess i don't need to introduce myself. (Remember me??....."The older sister with the frozen brain" from the first post?!!!! We live in sub-zero temperatures here these days, so it took a while to thaw!!)

Well, I'd like to begin my post with a kudos to my little sister ,who came up with this blog as a way to share with each other things we enjoy doing, as we both live in different corners of the world। I'd also like to like to dedicate this post to all homemakers, who besides being the chauffeur, the shopper, the cook, the janitor and everything else also find time to blog. So HATS OFF to you guys for doing what you do everyday expecting only a toothy smile or an uncontrollable burp for a paycheck. And to everyone who'd like to join in our little blogging expedition, Welcome to the Sisterhood!

In honour of the "Hats Off To Homemakers", check out these hats I crocheted.


This was made for my big girl. The instructions for this Cute Kid's Earflap Hat (crochet) is available here. I chose to go with a single colour and the yarn I used was Bernat Baby Boucle. You may have to register to get the pattern. Its free.


This "Dressy Cloche"was made from a pattern from the book called "Crochet Hats!" by Candi Jensen with Lionbrand Jiffy Thick & Quick yarn. Hopefully it prevents future brain freezes!! A similar pattern can be found here.

Now that our heads are nice and warm, how about pampering our tastebuds for a change?!! Why sis, didnt hear about any Sweets for your Sweetie for Valentines Day!

Mita